Water softener leaking? Find the first wet point before you bypass or replace it
Water at a softener's base may be condensation, a brine-tank overflow, a drain problem, a valve-area leak, or nearby plumbing. Map the first wet point before treating the whole system as failed.
The short answer
A leaking water softener is a water-path problem before it is a repair-or-replace decision. Keep clear of water near electricity, protect the floor, photograph the first wet point, and use the exact manual to decide whether a clearly identified bypass is an appropriate temporary step. Do not disconnect plumbing, remove a control valve, patch a pressure tank, or treat brine-tank water as harmless until the source is known. A cracked or bulging pressure tank, a persistent valve-area leak, a drain backup, a leak that continues while bypassed, or any water near electrical equipment belongs with qualified service.
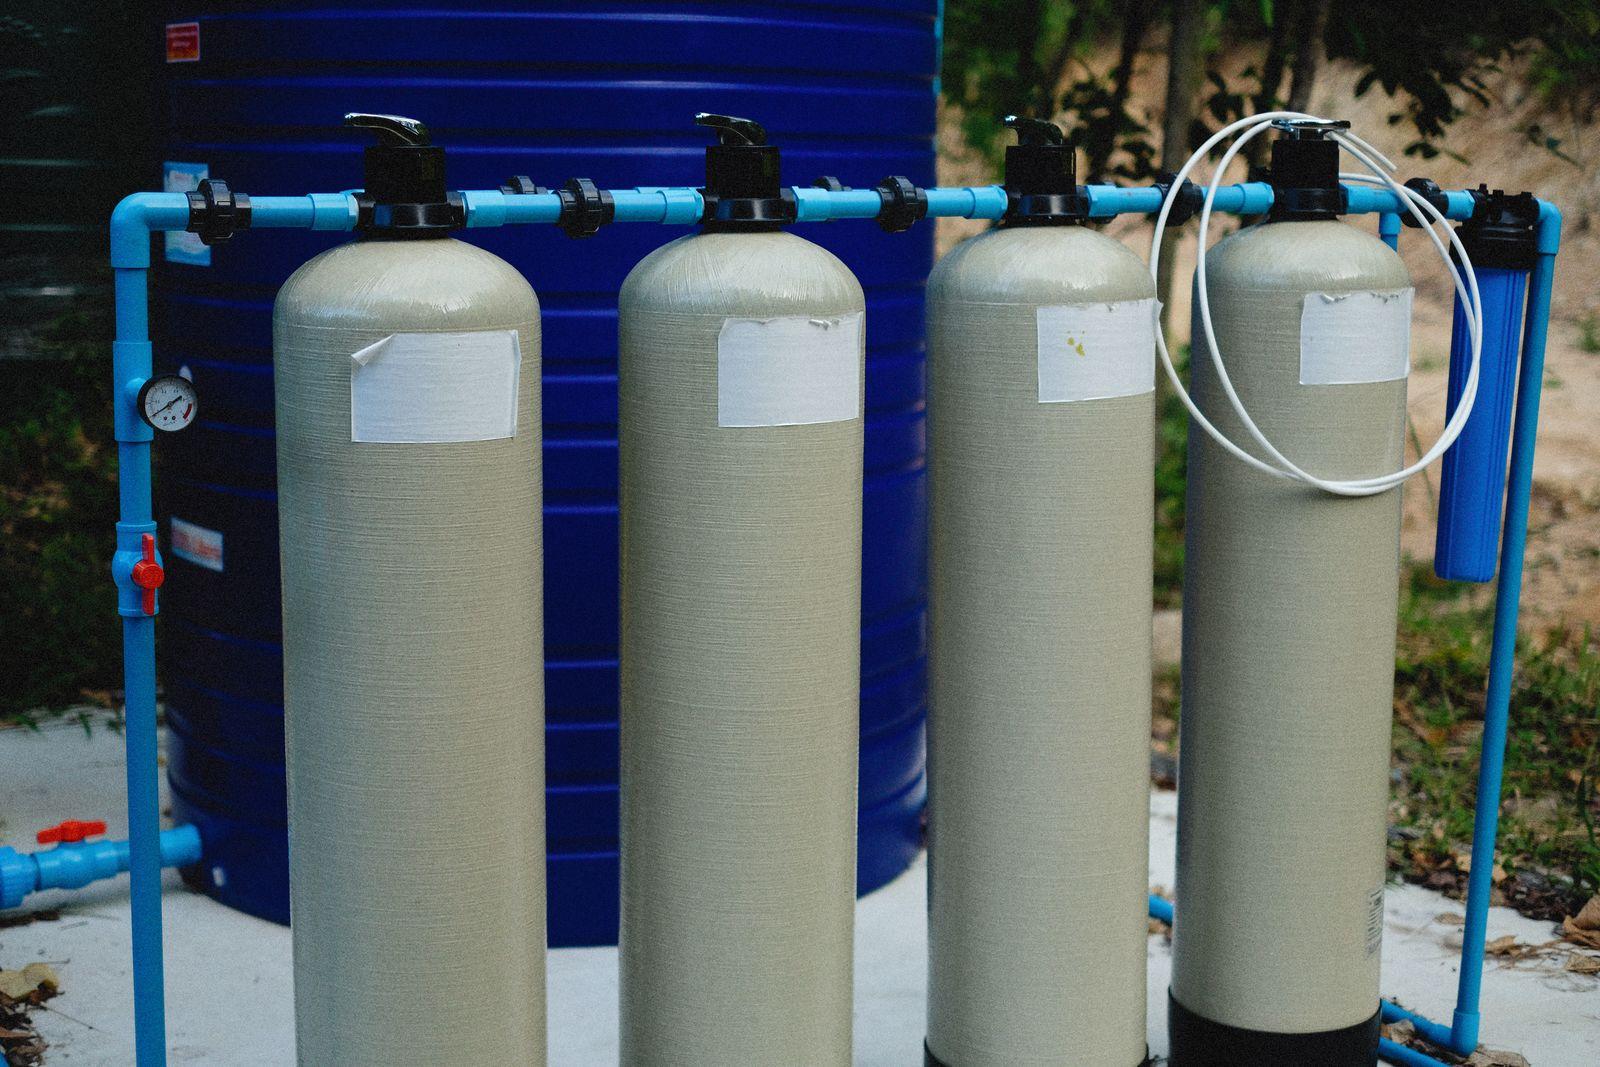
A water softener leak is water appearing at or around a treatment system. That plain definition matters because water at the bottom of the unit does not prove the tank at the bottom is split. Water can start at a valve connection, brine tank, drain line, nearby pipe, floor drain, or cold surface and travel down before it becomes visible.
Start with the first wet point, not the largest puddle. Culligan's June 2026 guidance makes the same distinction: condensation, a brine-tank problem, a drain or drain-line problem, a valve-area connection, and a cracked tank can all look like a bottom leak. The useful homeowner job is to preserve that distinction, protect the house, and give a technician an accurate record.
Do not turn a wet utility room into a repair experiment. If water is near a receptacle, cord, appliance wiring, panel, or fuel-burning equipment, stay out of the wet area and call for qualified help. Do not open a control head, loosen pressurized fittings, disconnect a drain line, force an unfamiliar bypass, or patch a resin tank. Those moves can change a manageable leak into a larger water or electrical event.
Cost and effort
Plan the practical side
| First visible water | Possible explanation | Safe homeowner evidence | Do not do |
|---|---|---|---|
| On a cold tank or cold pipe; no distinct drip | Condensation may be collecting and running downward | Photograph room conditions and dry exterior surfaces only if safe, then see where moisture returns | Assume condensation makes a continuing drip harmless or insulate piping without checking the manual and room conditions |
| At brine-tank rim or inside the salt tank | High brine level, float issue, drain/regeneration issue, or spill | Photograph the water level, salt condition, display, and drain route without reaching into controls | Siphon, drain, poke, or dismantle the tank without the exact model procedure |
| At a valve, bypass, or upper connection | Connection, seal, valve, or adjacent plumbing can be the source | Capture a dry-to-wet timeline and the model label | Tighten a pressurized fitting, remove the control head, or substitute parts by appearance |
| At drain tubing, floor drain, or wall penetration | Loose, blocked, misrouted, or backed-up drain path may be involved | Record whether the softener is regenerating and whether a drain is backing up | Disconnect or reroute the drain line, especially toward a sink, sewer, septic component, or exterior |
| From a tank body, seam, bulge, or crack | A pressure vessel may be compromised | Keep people clear, photograph from a dry area, and arrange prompt service | Patch, drill, clamp, or keep cycling the system |
| Near another appliance or pipe | The softener may only be where the water collected | Trace upward and outward; check the water heater, washer, supply lines, and floor path | Authorize a softener repair before the first wet point is established |
| Condition | What bypass may accomplish | What it cannot prove | Stop and call |
|---|---|---|---|
| Leak appears to involve the softener and the documented bypass is safe to use | It may stop normal water flow through the treatment unit while service is arranged | That the leak is inside the softener, that plumbing is safe, or that the home will have acceptable untreated water | Unclear valve position, corroded or leaking controls, shared plumbing, medical/water-quality dependency, or any water near electrical equipment |
| Leak continues after a documented bypass | It points attention to bypass hardware, adjacent plumbing, drain water, or another source | The exact failed fitting or pipe | Active flow, spreading damage, pressure loss, wet electricity, or uncertain ownership |
| Brine tank is unusually full | It may prevent a regeneration cycle from worsening the immediate condition if the model/provider directs it | Why the tank filled or whether a drain is safe | Overflow, drain backup, unfamiliar settings, or a need to open the control assembly |
| No active leak, only a damp exterior | It can wait for a dry-surface observation and model review | That a hidden leak never occurs during regeneration | Recurring dampness, corrosion, a high bill, or evidence of water below finished materials |
| Planning line | Published national signal | Keep separate in the written scope |
|---|---|---|
| Water-softener repair | $162–$985; $559 national average | Diagnosis, travel, exact component, labor, tax, warranty, return visit, water testing, and damage repair |
| Whole-house water-system repair | $50–$800 in Angi's type table | Whether the figure includes the actual softener, plumbing work, drain correction, or only a service call |
| Leak repair within a treatment system | $150–$300 in Angi's cited component guidance | The failed location, adjacent pipe, access, floor drying, restoration, and final leak test |
| Brine-tank component or replacement planning | $125–$700 in Angi's cited component guidance | Tank compatibility, float or drain cause, delivery, installation, disposal, and verification |
| Whole-system replacement | $1,000–$6,000 in Angi's cited component guidance | Sizing, water test, bypass and drain configuration, electrical needs, permits, old-unit removal, commissioning, and warranty |
Protect people and the room before identifying the leak
Move people, pets, stored paper, and absorbent belongings out of the area only from dry footing. Put a shallow pan, towels, or a water barrier in place only if you can do it without contacting wet electrical equipment or disturbing the source. If water is moving toward a receptacle, cord, appliance wiring, electrical panel, or fuel-burning equipment, do not reach across it for a plug or valve. Leave the area and use an electrician, plumber, water-treatment provider, utility, or emergency service that fits the immediate hazard.
- Active flow
- Use a known, dry, freely operating fixture or household shutoff only when it safely controls the active source and you know what it serves. Do not force a corroded or unfamiliar valve.
- Do not hide evidence
- A towel can limit spread; it should not become the only record. Photograph the condition first when safe, including the dry edge of the floor and the highest wet point.
- Water quality
- A bypassed softener can change water hardness and any treatment arrangement serving the home. If the household depends on treatment because of a private well or a specific documented concern, ask the provider what temporary use is appropriate.
Map the water path from top to bottom
Use a flashlight from a dry position and look for the first point that is actually wet: a pipe above the system, the valve area, the resin-tank shoulder, a brine-tank rim, a drain connection, or a floor drain. Dry only accessible exterior surfaces after taking photographs, then return later to see where water appears first. This is more useful than deciding from the puddle. Water follows gravity and can leave mineral tracks far below its origin.
- Condensation is a possibility, not a verdict
- Cold tank or pipe surfaces can sweat in humid rooms. A distinct bead trail, a new drip while the surface above is dry, repeated water during regeneration, or a growing puddle needs a source-specific evaluation.
- Look around the softener
- Trace nearby water-heater piping, washing-machine supplies, humidifier lines, floor drains, pressure-relief discharge, and overhead plumbing. A softener enclosure can be the catch basin for someone else's leak.
- No invasive search
- Do not remove a shroud, control head, drain fitting, tank lid, or wall finish to improve the view. A technician can make that access safely after the evidence is preserved.
Identify the exact model and its permitted owner actions
Find the model number on a visible label and use that model's manual or the installing provider's documentation. The words bypass, regeneration, brine refill, drain, overflow, and service can mean different things across valve and tank designs. Culligan advises that bypass may limit additional leaking while service is arranged, but it also states that bypass does not repair the issue. Treat that as the right mindset for any manufacturer: the manual decides the motion; the leak still needs a cause.
- Record before changing
- Save a photo of the display, any code, time, active cycle, valve position indicators, water level, and the manual page you relied on. A reset can erase the clearest clue.
- Warranty boundary
- Read the warranty and service terms before dismantling anything. A repair that defeats a warranty or damages a proprietary valve is not a savings strategy.
- Do not borrow instructions
- A video for a similar-looking softener is not a manual for the installed one. Skip every step that requires assumptions about plumbing direction, valve ports, electrical controls, or drain routing.
Separate a brine, drain, valve, tank, and nearby-plumbing pattern
A brine-tank issue often leaves evidence at the rim, salt tank, float area, or during a regeneration window. A drain-path issue can leave water near the drain line or floor drain. A valve-area leak begins high and tracks down the tank. A tank-body leak starts at a crack, seam, bulge, or wall of the pressure vessel. Nearby plumbing can imitate every one of these. Use the observed route to choose the provider, not a generic list of parts to replace.
- Drain warning
- A softener drain discharge and a floor-drain backup are not the same condition. Do not put chemicals into a drain, open a cleanout, or reroute discharge into an unapproved location to make water disappear.
- Pressure-vessel boundary
- A cracked or bulging resin tank is not a caulk-or-clamp project. Keep clear and arrange qualified service; pressure, water, and a weakened vessel are a bad combination.
- A practical opinion
- Do not buy a valve rebuild kit until someone has shown that the leak begins at that valve. The first wet point is a better use of ten minutes than a cart full of parts.
Use bypass only when the exact setup makes it safe
If the model manual or installer clearly identifies a bypass, its controls are dry and safely reachable, and the unit itself appears to be the involved path, use only that documented temporary step. Tell the household that water treatment may be changed while the system is bypassed. Watch from a safe distance for continuing water. If the leak persists, the softener did not become safe by being bypassed; the source may be the bypass, adjacent plumbing, drain water, or another component.
- Never force a position
- Stop if a handle is stiff, corroded, wet, unmarked, shared, or does not match the manual. A broken bypass can remove both treatment and water service while worsening the leak.
- No improvised isolation
- Do not disconnect a union, cut tubing, cap a drain, or remove a valve to create your own bypass. Those are plumbing modifications, not a homeowner observation.
- Confirm the temporary state
- Record the position, time, water result, and any continued dripping. That gives the service provider a useful before-and-after condition without claiming a diagnosis.
Call with a repair scope that can be compared
Give the provider the model, installation age if known, water source, photos of the first wet point, display or code, regeneration timing, drain route, bypass result, floor damage, warranty, and any change in water quality or bill. Ask the provider to state the source, test used, repairable component, required parts, labor, drain/plumbing work, water test, warranty, and final leak-and-operation test. A national cost range helps plan cash; it cannot tell you which component failed in your room.
- Repair versus replacement
- Compare a written repair scope with a like-for-like installed replacement only after diagnosis. Include capacity and water-test basis, drain and bypass configuration, permits, removal, delivery, plumbing or electrical changes, startup, and warranty.
- Protect finishes
- If water reached flooring, drywall, cabinets, insulation, or stored property, separate source repair from drying and restoration. The lowest plumbing quote may not include either.
- Close the record
- Save diagnosis, photos, model, part number, water test if used, invoice, warranty, final leak test, and next service date in /articles/home-maintenance-record-system. Put confirmed—not hoped-for—costs into /tools#maintenance-reserve.
Put the guide to work
Field notes
- First wet point
- Photograph the highest visible wet point, the floor boundary, tank bodies, valve area, bypass, drain connection, nearby piping, and floor drain before wiping anything dry.
- Name the system
- Record the manufacturer, full model, serial number privately, installation date if known, water source, manual link, warranty, service company, and the exact bypass instructions.
- Do not infer
- A wet floor does not identify a cracked resin tank. A salt bridge does not prove an overflow. A bypass does not repair a leak, and soft water from a faucet does not prove the unit is safe to run.
- Related reading
- Use /articles/find-and-map-water-shutoff before an active leak makes valve identification urgent, /articles/why-water-bill-suddenly-high when a meter or bill suggests hidden flow, /articles/home-maintenance-record-system for the model and service file, and /tools#maintenance-reserve for a written repair-or-replacement scope.
Common questions
Frequently asked questions
- Why is my water softener leaking from the bottom?
- Water at the bottom can be running down from a valve connection, brine tank, drain line, nearby pipe, or condensation. A cracked tank is possible but should not be assumed from a puddle. Photograph the first wet point from dry footing and use the exact model documentation before changing a bypass or calling for parts.
- Should I put a leaking water softener in bypass?
- Only when the exact bypass is clearly identified, dry and safely reachable, the manual or installer directs its use, and the condition does not involve wet electrical equipment or uncertain plumbing. Bypass may temporarily stop flow through the treatment unit; it does not repair the source or prove the softener caused the leak.
- Can a water softener leak because of condensation?
- It can. Cold tanks or pipes in a humid area may collect moisture that runs to the floor. A distinct drip, water at a valve or drain connection, repeated moisture during regeneration, mineral tracks, or a growing puddle still needs source-specific evaluation.
- What if the brine tank is full of water?
- Photograph the water level, salt condition, display, drain route, and model information. Do not siphon, poke, dismantle the valve, or assume salt is the only problem. A brine-tank condition can involve model-specific float, valve, regeneration, or drain issues that need the exact manual or service provider.
- Can I repair a leaking resin tank with a patch?
- No. Do not patch, drill, clamp, or keep operating a cracked or bulging pressure tank. Keep people clear, protect the area from a safe position, and arrange qualified assessment. A tank-body leak is different from a serviceable external fitting.
- How much does water-softener repair cost?
- Angi's 2026 national repair data lists $162 to $985 with a $559 average. Its whole-house water-system table lists $50 to $800, and its leak-repair reference lists $150 to $300. Use those as planning signals only; diagnosis, model, parts, labor, plumbing changes, access, drying, restoration, and local requirements determine a real quote.
- Who repairs a leaking water softener?
- Start with the manufacturer-authorized service provider or qualified water-treatment professional for the exact model, especially for the control valve, brine system, resin tank, and warranty. A plumber may be needed for adjacent supply piping, shutoffs, drains, or floor-drain problems. Water near electricity needs an electrician or emergency response before ordinary service.
- Can a water-softener leak raise my water bill?
- Yes, a leak or unintended regeneration/discharge can increase metered use, but a bill does not identify the source. Compare billing days and usage, then follow the utility-approved no-use meter method when safe. See /articles/why-water-bill-suddenly-high for a controlled bill-and-meter investigation.
Use the findings
Open the detailed check for what you found
Make the next step useful
Put this guide on your home plan
Know when to call a professional. Stop if work involves active gas leaks, damaged service wiring, structural movement, unsafe heights, suspected contamination, or a problem you cannot confidently isolate.
Editorial review and sources
Reviewed by: Smart Homeowners Editorial Desk
Last reviewed: November 12, 2026
Original Smart Homeowners editorial; not adapted from a third-party article.
Source notes and limitations
- Search-demand evidence checked November 12, 2026: the exact query "water softener leaking what to do" returned Culligan at position 1, Water eStore at position 2, a Water eStore topic page at position 3, and GE Appliances at position 4. Competitor clicks: UNKNOWN. Position is recorded as demand evidence, not traffic or repair-frequency evidence.
- Originality and intent check: compared the full current SmartHomeOwners inventory, the supplied 4Homes inventory, and the current 4Homes corpus. This article owns first-wet-point triage and bounded bypass decisions for a leaking whole-home softener. It is distinct from SmartHomeOwners water-bill, shutoff, pressure, treatment-testing, and appliance-leak articles, and from 4Homes' water-softener-no-salt and general water-leak planning guides. It is not a duplicate of a same- or fuzzy-slug candidate. No redirect is proposed.
- Information gain: current top results broadly list causes and recommend bypass or service; this guide separates the first-wet-point record, temporary bypass limits, brine/drain/valve/tank patterns, and a complete repair-scope comparison. Visible FAQs and FAQPage JSON-LD are generated from this single faqs array by the existing article adapter. Cost figures are dated national planning references, not local quotes.