How to clean a bathroom exhaust fan safely without soaking the motor
Identify the exact fan, isolate its circuit, remove only the manufacturer-approved grille, vacuum accessible dry dust, and keep water away from the motor, wiring, sensors, and light components.
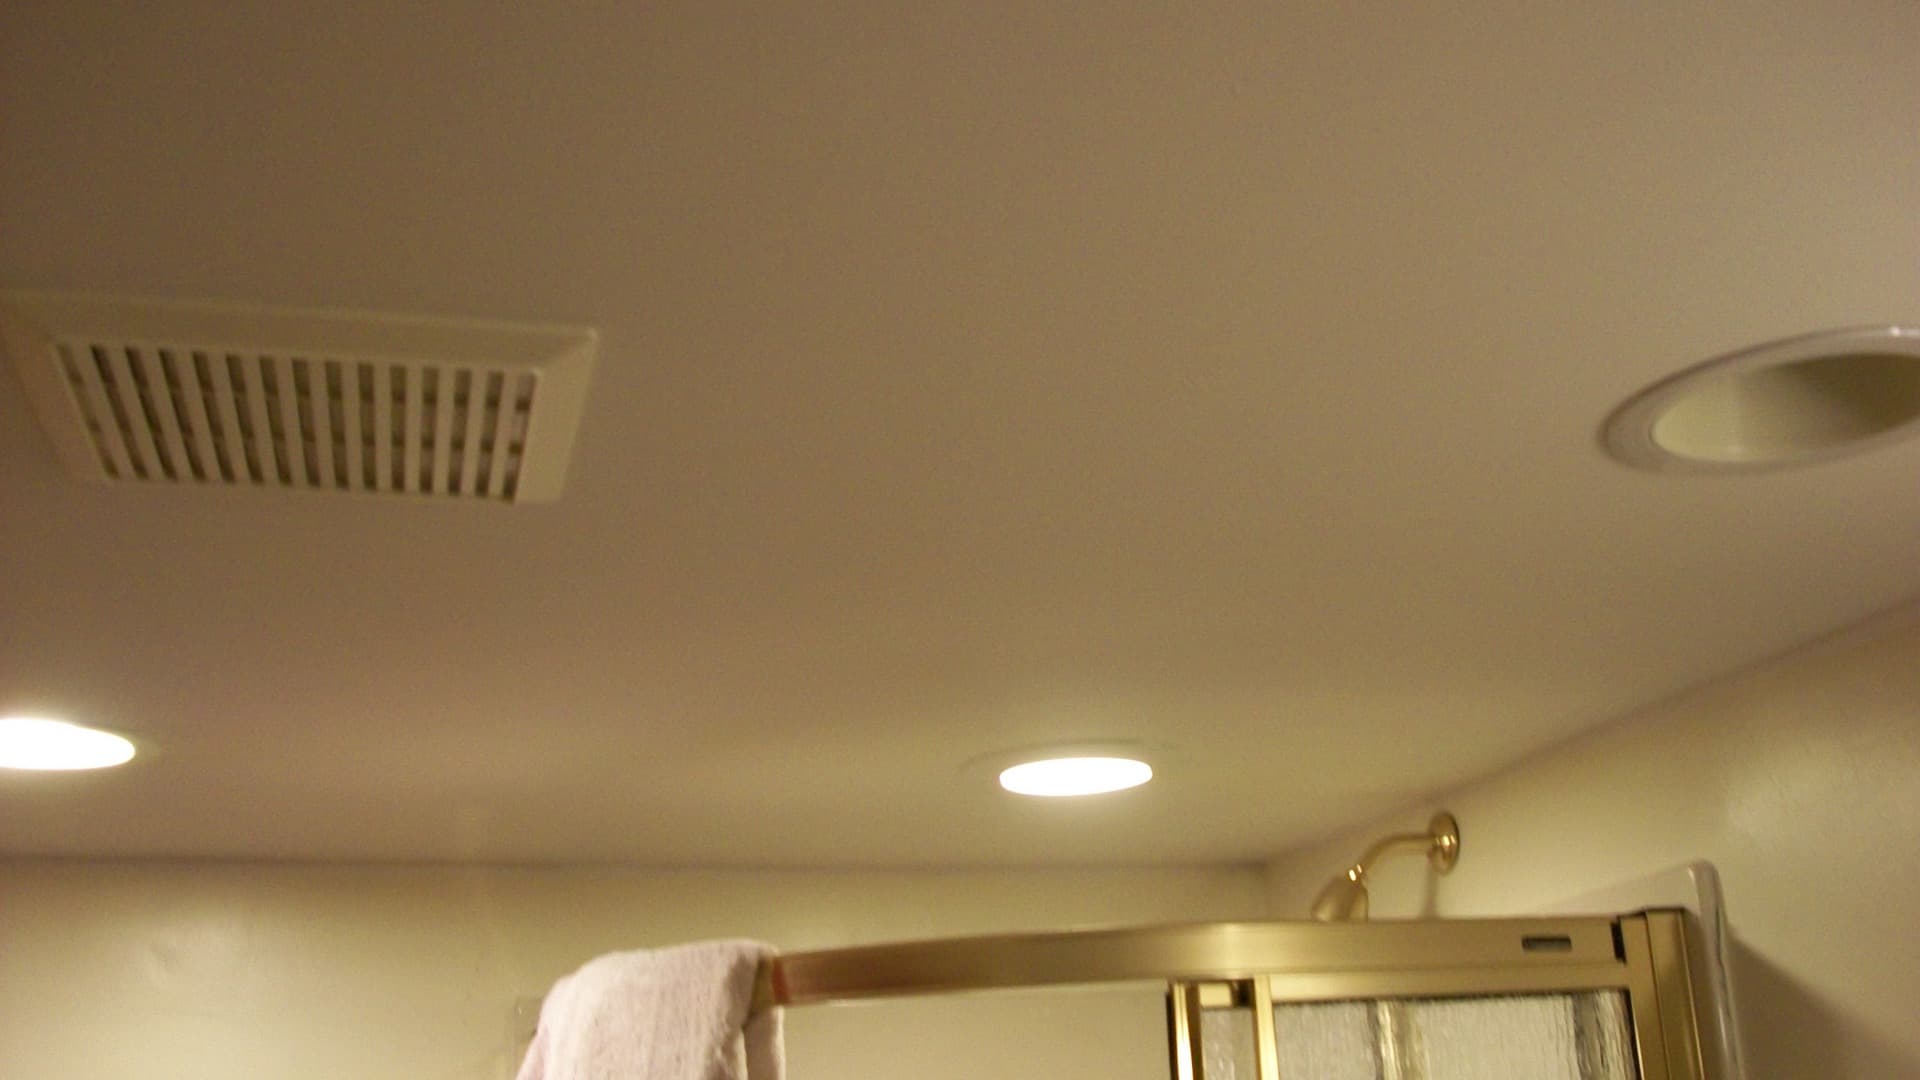
A bathroom exhaust fan is a powered local-ventilation appliance that pulls humid bathroom air through a ceiling or wall grille and sends it through a duct to the outdoors. Cleaning it safely is an owner-level surface-maintenance job, not a motor repair or duct-cleaning project. The narrow goal is to remove accessible dry dust without introducing water, damaging a sensor or light, changing a control setting, or taking apart a component the manual does not identify as removable.
That distinction matters because two fans that look similar from the floor may be built differently. One may have a spring-held plastic grille. Another may combine a fan with an LED panel, heater, humidity sensor, motion sensor, speaker, or continuous-ventilation control. Some grilles can be washed after removal; others contain electrical parts or finishes that should not be submerged. Find the model and its use-and-care instructions before deciding what comes off.
Home Ventilating Institute consumer guidance starts fan cleaning by switching power off at the circuit breaker and confirming that the wall switch can no longer start the fan or light. Panasonic and Broan-NuTone manuals likewise require power isolation before cleaning or service. Their maintenance instructions support vacuuming dust from accessible fan surfaces, while Panasonic warns against immersing the motor and Broan-NuTone describes the motor as permanently lubricated. Those are useful boundaries: vacuum, do not blow; keep the motor dry; do not add oil unless the exact manual tells you to.
My view: a clean grille is not worth an electrical gamble. If you cannot identify the circuit, cannot reach the grille from a stable dry surface, or cannot tell whether a wire or plug belongs to a removable lighted grille, stop. An electrician or qualified ventilation technician can clean and evaluate the unit without turning a small maintenance task into an improvised repair.
The short answer
Cleaning a bathroom exhaust fan means removing a model-approved grille, vacuuming accessible dry dust from the grille and fan opening, washing only a removable part the manufacturer says may be washed, drying it completely, and reinstalling it without opening electrical or duct components. Turn the correct breaker off and verify that every fan, light, heater, timer, and automatic control is dead before touching the unit. Stop for damaged wiring, heat marks, water in the housing, a loose housing, a fan that will not start, or any step the installed manual assigns to service personnel.
Cost and effort
Plan the practical side
| Need | Conservative cost | Effort and decision rule |
|---|---|---|
| Manual, phone camera, vacuum, cloth, mild detergent, and safe step stool already owned | $0 incremental | Plan one dry work session plus complete drying time. Use only the tools and removable parts allowed by the exact manual. |
| Compatible soft vacuum brush | $7.97 for a 1-7/8-inch RIDGID brush; $11.97 for a 1-1/4-inch brush/crevice kit | Confirm hose diameter and use gentle suction. These are U.S. Home Depot online examples, not universal fits or required purchases. |
| Microfiber cloths | $9.98 for a 24-pack | One clean cloth is enough when the manual permits wiping. The cited U.S. online pack is a price reference, not a reason to buy 24 cloths. |
| Stable two-step stool if safe reach is otherwise impossible | $17.98 for one 225-pound-rated steel example | Buy only a stool rated for the user and suitable for the dry floor. If reaching still requires leaning over the tub or standing in it, stop and hire help. |
| Electrical, airflow, duct, water, or contamination diagnosis | Obtain local written quotes | Ask for the diagnostic fee, included testing, repair scope, parts, permit needs, and whether an electrician and ventilation contractor are both required. |
Identify the fan, grille, controls, and owner-cleaning boundary
Start with the fan off and the bathroom dry. Photograph the grille, wall controls, timer, humidity control, separate light or heater switch, and any indicator. Search the exact model manual rather than relying on a brand-level cleaning video. Read the operation, cleaning, maintenance, lamp or LED, and service sections. Draw a line around what the manual gives the homeowner permission to touch. Usually that may include a grille held by springs or tabs and accessible dry surfaces behind it. It may not include the blower assembly, motor plug, junction box, sensor, heater, light driver, duct adapter, backdraft damper at the housing, or a grille with integrated electrical components. Panasonic’s RG-R811A instructions, for example, describe a spring-attached quick-removal grille and direct the user to vacuum dust from the fan body, while warning not to immerse the motor. A Broan-NuTone EZ80NC manual directs the owner to remove the grille and vacuum the unit interior with a dusting brush attachment. Your model may differ.
- Identity record
- Record manufacturer, exact model, fan-only or fan/light/heater combination, grille attachment, control types, manual URL or file, and any cleaning warning. Save the photo and manual with the home maintenance record.
- Model mismatch
- If the manual drawing, grille, controls, or fasteners do not match the installed unit, do not force the generic procedure. Look for a second label or contact the manufacturer with photos.
- Service-only clues
- A wiring cover, hard-wired light panel, heater, inaccessible plug, damaged sensor, fastener not named in the maintenance section, or instructions that say qualified service means the owner-cleaning job ends there.
Build a dry, stable work zone before switching anything off
Finish bathing and let wet surfaces dry. Remove rugs, bottles, cords, and anything that narrows your footing. If the grille is above a tub or shower and you cannot reach it while standing on a stable dry surface outside the bathing fixture, hire help rather than putting a stool in the tub. Set the vacuum where its hose will not tug you off balance, and keep the cord away from water. Put tools within easy reach so you are not twisting from the top step. Protect your eyes from falling dust and consider a well-fitting mask if the grille is heavily loaded, but do not disturb suspected mold or animal debris. If the ceiling is soft, stained, sagging, actively wet, or damaged around the housing, stop before touching the fan. The source of moisture and the condition of the electrical appliance need evaluation first.
- Access check
- Both feet supported; stool fully open and level; floor dry; no need to lean over a tub, toilet, or vanity; vacuum hose free; door not able to strike the stool; adequate portable light that does not rely on the fan fixture.
- Stop before setup
- Water dripping from the grille, brown heat marks, melted plastic, burning odor, buzzing, repeated breaker trips, loose ceiling material, droppings or nesting, or visible damaged conductors are not cleaning conditions.
- Household check
- Tell other occupants the circuit will be off and the bathroom is temporarily closed. Protect medical equipment, alarms, or other loads if the breaker serves more than the fan.
Turn off the breaker and prove every control is dead
Turn the fan, light, and any heater off at their normal controls. At the service panel, switch off the breaker identified for the bathroom fan. Prevent someone from restoring it while you work; use the panel’s lockout provision when available or place a clear warning at the panel and have another adult guard the situation. Return to the bathroom and try every associated control: fan switch, timer, light, night-light, heater, boost switch, humidity control, and motion-triggered function. Nothing should start or illuminate. Wait long enough for timed or delayed controls to attempt operation. A wall switch in the off position is not electrical isolation, and a fan/light combination may have more than one feed or control. If any function still works, if the circuit label is uncertain, or if you would need to expose conductors to test further, stop and call a licensed electrician. Do not proceed by guessing at another breaker while your hands are at the unit.
- Dead-control checklist
- Fan silent; light and night-light dark; heater inactive; timer cannot start equipment; humidity or motion mode does not start equipment; no remote or smart control response; breaker remains off; another person knows not to restore power.
- Automatic fan warning
- A humidity, occupancy, or continuous-ventilation fan can start without a simple switch command. Isolation at the correct breaker, followed by a control check, is required before touching the grille.
- Electrical boundary
- Do not remove the junction-box cover, test exposed wires, disconnect hard wiring, alter a control, or treat a nonresponsive switch as proof that the circuit is dead.
Lower only the grille the manual identifies as removable
Support the grille with one hand and follow the model’s removal drawing. Many plain grilles pull down a short distance, exposing two spring clips that are squeezed and released one at a time. Others rotate, use tabs, retain a lens, or include a plug for an approved removable light assembly. Do not yank when the grille drops only an inch or two; that is often where springs, a short lead, or a light connection become visible. Keep your face to the side of falling dust. If paint or caulk has bonded the grille to the ceiling, do not pry hard enough to crack the ceiling or deform the housing. Score only where the manual and surface condition make that safe, or leave it for a professional. Photograph spring orientation before removal. Never let an electrical component hang by its wire, and never disconnect a plug unless the owner-maintenance instructions explicitly tell you to.
- Plain removable grille
- Follow the spring, tab, or screw sequence in the manual; support the part; note its orientation; place clips or approved screws in a container.
- Grille with light or sensor
- Treat it as an electrical assembly until the exact manual says which portion is removable and how. Do not immerse it or wipe openings with a wet cloth.
- It will not release
- Stop if a hidden fastener, wire, paint bond, brittle plastic, or unfamiliar clip resists normal manual-directed movement. Stop rather than forcing it; prying can damage the ceiling, wiring, housing, or grille.
Vacuum accessible dry dust instead of driving it deeper
Begin with the removed grille while it is dry. Use low or moderate suction and a soft dusting brush so the vacuum carries dust away rather than scattering it. Then, if the manual permits, hold the brush at accessible surfaces inside the opening: the housing lip, stationary dust on the fan body, and exposed dry areas the maintenance diagram identifies. Keep the nozzle from pulling on the blower wheel, motor leads, sensor, lamp holder, LED driver, insulation, connector, or damper. Do not spin the blower with the vacuum, a finger, or compressed air. Do not remove the blower or motor merely to reach more dust. Compressed air is a poor substitute because it can push contamination into bearings, controls, the ceiling cavity, or your breathing zone. If packed debris is beyond the reachable owner-cleaning area, have a qualified technician clean the assembly using the model’s service procedure.
- Vacuum path
- Dry grille front and back; spring recesses; housing lip; accessible stationary dry dust named in the manual. Keep the brush moving gently and let suction capture debris.
- Hands off
- Motor, wiring, connectors, circuit boards, sensors, heater, lamp holder, LED components, hidden blower surfaces, junction box, duct connection, and any sharp or inaccessible edge.
- Debris that changes the job
- Greasy deposits, insect or rodent material, suspected mold, insulation fragments, water tracks, corrosion, scorch marks, or construction dust packed into the motor area call for source-specific professional evaluation.
Wash only a manufacturer-approved removable grille, then dry it fully
Check the manual before introducing water. HVI’s general care guidance allows a removed grille to be washed with mild detergent and water, dried, and replaced, but it also says not to let water enter the motor, lamp holder, or electrical connections. Panasonic’s instructions for applicable models allow a non-abrasive kitchen detergent on the grille, require it to be wiped dry, and warn against hot water and immersion of the motor. Those directions do not make every grille washable. For a plain grille your exact manual approves, use a basin away from the fan opening, mild detergent, and a soft cloth. Avoid hot water, solvents, bleach, scouring pads, and spray cleaner. Rinse only as instructed. Dry both faces, the spring channels, tabs, screw pockets, and decorative recesses. Set it aside until no droplet or damp seam remains. If the grille contains a light, speaker, sensor, wiring, metal component the manual excludes, or an unknown finish, keep it dry and use only the approved method.
- Wash decision
- Yes only when the exact manual identifies the removed grille or named component as washable. Otherwise use dry vacuuming or the manufacturer’s stated wipe method.
- Dry standard
- No visible moisture, no water trapped around clips or lens edges, and no damp cloth returning to the fan opening. Air-dry longer when the shape has channels that can retain water.
- Never spray upward
- Do not spray cleaner, mist, steam, or water into a ceiling or wall fan. Apply any approved product to the removed part at a sink or basin, not to the installed housing.
Reassemble the dry parts and run a short controlled check
Before reinstalling, compare the opening with your starting photo. Confirm that you did not dislodge a connector, wire, clip, lens, sensor cover, or insulation and that no tool, cloth, or loose debris remains. Refit only the parts you removed under the owner instructions. Seat spring clips in the correct slots, align tabs without forcing them, and bring the grille evenly to the ceiling. Do not pinch a wire or trap a damp cloth. Step down and remove the stool, vacuum, and tools before restoring power. At the service panel, turn the breaker on. From the floor, operate the normal control and listen through startup and steady running. Check the light and approved automatic controls without changing hidden settings. Turn the unit off and confirm any intended delay behaves according to the manual. Switch the breaker off again and call for service if you hear scraping, grinding, repeated clicking, a new hum, or if the fan trips the breaker, vibrates strongly, smells hot, fails to start, or a light flickers.
- Before power
- Grille fully dry; springs or tabs seated; no pinched lead; lens secure; housing visually unchanged; tools removed; user standing on the floor.
- Normal check
- Expected control response, stable sound, no rubbing, no strong vibration, no odor, no breaker trip, no loose grille, and light or sensor behavior matching the manual.
- Do not troubleshoot live
- If operation is abnormal, switch the breaker off. Do not pull the grille down while energized to watch the motor, reseat a connector, or nudge a moving wheel.
Verify outdoor exhaust only from the ground and write the handoff
A clean fan still needs an outdoor path. The DOE Building America material distinguishes local bathroom exhaust, which removes contaminants near their source, from whole-house ventilation. HVI says accessible duct connections may be inspected and the outdoor termination damper should generally open when the fan runs and close when it stops. Keep that verification within safe access: from the ground, identify the wall, roof, or soffit termination if it is visible and observe whether its exterior damper responds. Do not climb a ladder or roof, remove the cap, reach into the duct, or assume a hidden soffit opening belongs to this fan. Do not disconnect, brush, snake, or vacuum ductwork from the bathroom opening. A damper that is stuck, a duct that terminates inside the attic, water dripping from the fan, persistently weak ventilation after cleaning, or an unknown termination requires a qualified ventilation or HVAC professional. Electrical faults, damaged conductors, unreliable breaker identification, overheating, or failed controls belong to a licensed electrician. Record the model, manual, date, what was removed, cleaning method, control test, observed outdoor response, and unresolved findings.
- Owner maintenance checklist
- Exact model confirmed; manual reviewed; dry stable access; breaker off; all controls verified dead; approved grille removed; accessible dry dust vacuumed; only approved grille washed; grille fully dry; correct reassembly; floor-level operation check; outdoor damper observed only from safe ground; record saved.
- Ventilation professional
- Unknown or indoor duct termination, inaccessible blockage, stuck exterior damper, condensation in duct, water at housing, weak airflow after approved cleaning, loose housing, heavy contamination beyond the grille, or service-level blower removal.
- Electrician
- Circuit cannot be positively isolated, more than one live feed is suspected, breaker trips, conductors or connectors are damaged, heat or burning odor is present, controls behave unpredictably, light or heater faults share the unit, or the manual requires electrical service.
Put the guide to work
Field notes
- Model first
- Photograph the grille and controls, then find the manufacturer and model from household records, a visible label, or a safely readable label after the grille is removed as the manual allows. Do not reach past the fan opening or remove a wiring cover to hunt for a number.
- Dry access only
- Use a stable floor, built-in platform, or properly placed step stool rated for the user. Keep the floor dry, wear clean dry footwear, move bath mats and clutter, and have another adult nearby when access would otherwise be awkward. Do not stand on a toilet, tub edge, sink, countertop, folding chair, or wet shower floor.
- Useful tools
- Exact manual, flashlight, phone camera, vacuum with a soft dusting brush and controllable suction, soft dry brush if the manual permits, microfiber cloth for the removed grille, mild detergent only when approved, basin, towel, and a small container for non-electrical clips or screws the manual directs you to remove.
- Keep these out
- Compressed air, shop-air nozzles, spray cleaner, steam, bleach mist, solvents, abrasive pads, soaking of unknown parts, oil, improvised lubricants, powered brushes, and owner duct-cleaning tools. They can drive debris or moisture into the motor, controls, light components, wiring, or duct.
- No universal calendar
- HVI gives at-least-annual cleaning as general consumer guidance, but the installed manual, runtime, dust loading, household conditions, and control mode should set the plan. A continuously operating fan or visibly loaded grille may need attention sooner; a generic interval does not authorize deeper disassembly.
Common questions
Frequently asked questions
- Can I clean a bathroom exhaust fan without turning off the breaker?
- No. Switch the correct breaker off, prevent accidental re-energizing, and verify that the fan, light, heater, timer, humidity control, motion control, and any other associated function cannot operate. A wall switch alone is not isolation. If any function remains live or the circuit is uncertain, call a licensed electrician.
- Can I wash the bathroom fan grille in water?
- Only if the exact model manual identifies the removable grille as washable. A plain approved grille may be cleaned with the specified mild detergent and then dried completely. Do not immerse a grille containing a light, sensor, speaker, wiring, unknown metal component, or finish unless the manufacturer expressly allows it.
- Can I use compressed air to clean a bathroom exhaust fan?
- Do not blow compressed air into the fan. It can drive dust into the motor, bearings, sensors, controls, duct, ceiling cavity, and room air. Use a vacuum with a soft dusting brush on the accessible dry surfaces the manual permits, without spinning or pulling on the blower.
- Should I remove the bathroom fan motor or blower wheel to clean it?
- Not as a generic homeowner step. Remove a blower, motor, plug, wiring cover, or duct part only when the exact manual assigns that procedure to the owner and you have the required competence. Otherwise stop at the grille and accessible dry surfaces and use a qualified technician for deeper cleaning.
- How often should a bathroom exhaust fan be cleaned?
- There is no single interval that fits every model and installation. HVI gives at-least-annual cleaning as broad consumer guidance, but the installed manual, runtime, continuous or intermittent control, visible dust loading, noise change, and household conditions should set the plan. Cleaning sooner does not authorize deeper disassembly.
- Why is my bathroom exhaust fan still weak after cleaning?
- A clean grille cannot correct an obstructed, disconnected, crushed, long, or poorly terminated duct; a stuck damper; unsuitable capacity; inadequate makeup air; motor trouble; or control problem. Record the symptoms and have a qualified ventilation or HVAC professional assess airflow, duct routing, and termination without owner duct disassembly.
- When should an electrician handle a bathroom fan instead of a ventilation technician?
- Use a licensed electrician when you cannot positively isolate power, a breaker trips, wiring or connectors are damaged, there are heat marks or burning odor, the fan or light behaves unpredictably, or electrical controls need diagnosis. Use a ventilation or HVAC professional for airflow, duct, damper, termination, condensation, housing, or service-level cleaning issues; some jobs require both.
Use the findings
Open the detailed check for what you found
Make the next step useful
Put this guide on your home plan
Know when to call a professional. Stop if work involves active gas leaks, damaged service wiring, structural movement, unsafe heights, suspected contamination, or a problem you cannot confidently isolate.
Editorial review and sources
Reviewed by: Smart Homeowners Editorial Desk
Last reviewed: October 1, 2026
Original Smart Homeowners editorial; not adapted from a third-party article.
- U.S. Department of Energy Building America Solution Center — HVAC Whole-House Ventilation
- Home Ventilating Institute — Care and Maintenance of Your Bathroom Exhaust Fan
- Panasonic — RG-R811A Ventilating Fan Installation and Maintenance Instructions
- Broan-NuTone — EZ80NC Ventilation Fan Installation Guide
- The Home Depot — RIDGID 1-7/8-inch Dusting Brush
- The Home Depot — RIDGID 1-1/4-inch Dusting Brush and Crevice Tool Kit
- The Home Depot — HDX Multi-Purpose Microfiber Towels
- The Home Depot — Gorilla Ladders 2-Step Compact Steel Step Stool